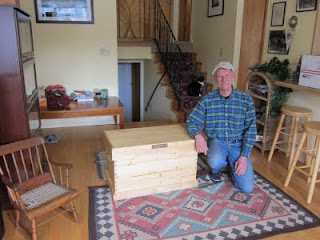
I had made a sled with a box-joint jig for my big table saw, with inserts to produce box joints of 1/2" and 3/4" for the most common sizes of dimensioned wood. This pine was 3/4" stock, so I decided on making the main box 18" X 18" X 24" with 3/4" box joints. Rather than nail on the bottom, like my grandfather's tool chest, I used a sheet of plywood fitted into a dadoed groove. No matter how heavy, the bottom wouldn't fall out. Here is the main box with joints glued.

Next, I hand-cut a dovetail joints in the corners of 3" boards for the base trim, glued it to the box, and beveled the top so it wouldn't have a sharp edge.

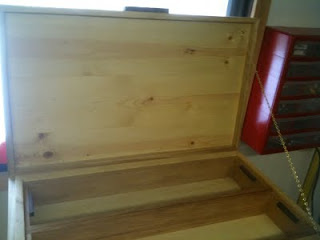
For the lid, I joined two 1x10 boards, planed them smooth, added a 1 1/2" trim around the edge with mitered joints and set in on the box with two brass hinges attached flush at the back. With the lid set straight on the top of the box, I added a mitered 3" trim of hemlock around the upper edge, creating a lip at the top of the box for a tight closure.

A small piece of walnut has been sitting in my little scrap box, so I planed it into a rhomboid handle, glued it on the front of the lid so it would be easier to lift. Then I screwed a brass chain onto the lid and box to keep the lid from falling backwards and breaking the hinges.

Now time to put in the trays. I made 3 trays: two for the upper level, resting on a half-inch board fastened inside at each end, with a lip at the bottom to hold the third tray, which slides underneath the other two. I made the trays out of hemlock, a very straight-grained wood with a little color to it. The bottom tray is one inch shorter then the top trays so it will sit on the rails underneath. My grandfather's trays had little dividers in them, so I put dividers in the bottom tray; I could always add dividers.


For a finish, I applied Minwax 'Natural' to keep the blond of the pine as natural as possible, then I hand rubbed several coats of tung oil into the wood for a long-lasting hard finish. The trays took on a beautiful red color, complementing the light pine. I made the box for Rebecca who has been such a wonderful friend the past three years. On Saturday I delivered it to her home in Wasilla where she immediately put it to good use as a repository for the train set her grand-children play with.

Afterward we skied at Hatcher Pass, but forgot the boots, so we walked on the new snow until our ears froze. We thought it was going to be so warm and spring-like, but it was mid-winter and the snow was fluffy powder, still!!! Then we drove to Palmer and had a fine dinner at Turkey Red, our favorite restaurant in the valley.


2 comments:
That's a beautiful tool box, Ralph. It reminds me of the one my dad had except along the inside front of the box there was a pice of wood with spacers where he could drop in files and wrenches vertically. You have made an heirloom!
It's a wonderful chest. I love it Ralph. It's a train chest and a bench! Lovely!!
Post a Comment